OC Tutorial: Hard Drives
When writing programs you'll usually want to have your programs stick around, so the /tmp folder is no long-term solution. Enter hard drives. When you put a hard drive into a computer it will be automatically mounted in the /mnt folder, named after the first letters of its address. While this may be enough for experimenting, you'll want more flexibility and comfort after a while. This tutorial will introduce the concept of labeling and mounting hard drives.
Note: all concepts in this tutorial also apply to floppy disks.
First, insert a fresh hard drive into a computer:
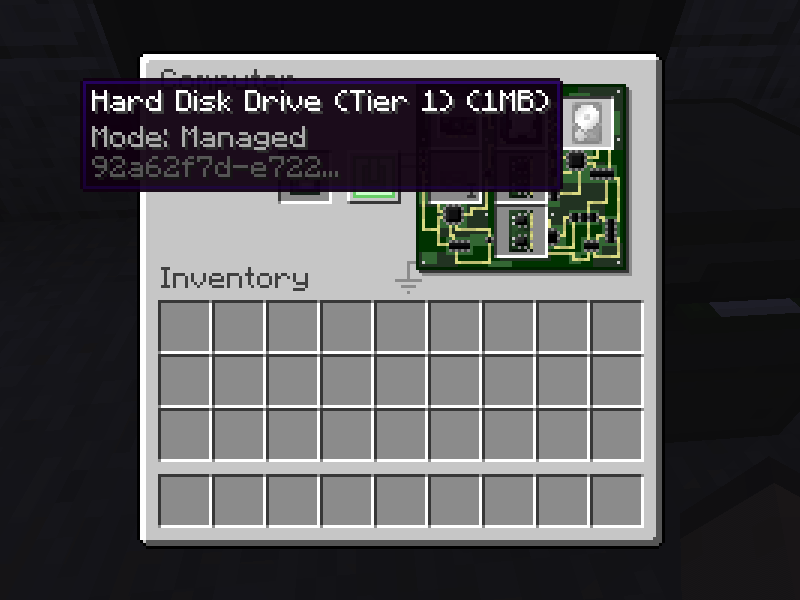
You'll notice in the tooltip of the hard drive that it has been assigned an address (that shortened, alpha-numeric string). You don't have to remember that, it's just there for reference. Next, open the screen's GUI and type df. This program lists all present file systems and their current mount points. Among them you'll notice one that's only known by address (unlike the ROM and temporary file system). That should be the address you saw in the tooltip, earlier.

What we want to do now, is to assign a name to our hard drive, so we don't have to reference it by address all the time. Run label to get the usage information of the labeling program. We'll use the -a option here, but you could also label it by providing the path to its default mount point in the /mnt folder.
Run the program with the desired parameters, i.e. name the disk as you'd like. Note that the 92a in the screen shot is the beginning of the hard drive's address. For most programs that need an address you can abbreviate the address, as long as it's still unique among the other components connected to the computer.
Once you've named your hard disk that name is also shown in the hard disk's tooltip. Run df again to verify the hard disk is now named:
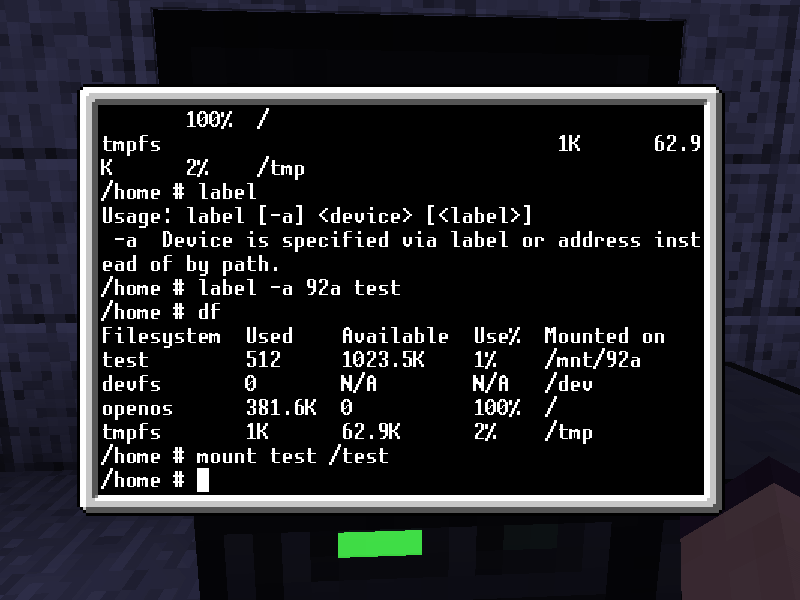
We can now mount the hard drive while referring to it by name. Type mount <label> <path> to mount the hard drive with the specified label at the specified path. Hard drives can be mounted in multiple locations, so doing that will not invalidate the default mount in the /mnt folder.
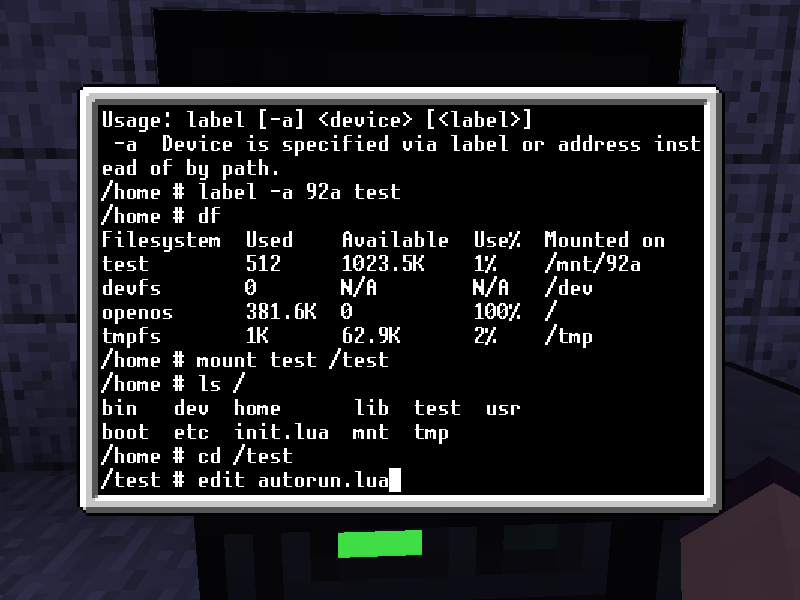
Now, computers do not store any state across reboots. Meaning if you shut down or reboot your computer, it crashes or runs out of power, you'll have to mount your disk again after restarting. This can get annoying very quickly, so let's create an autorun script that mounts the disk for us when it is inserted. Every hard drive can have such an autorun script. It has to be named autorun or autorun.lua and must be in the root of the hard drives folder structure. This script is automatically executed when the disk is installed in a computer - unless you disable autorun via the the file system API.
Switch into your freshly mounted folder, and run edit autorun.lua.
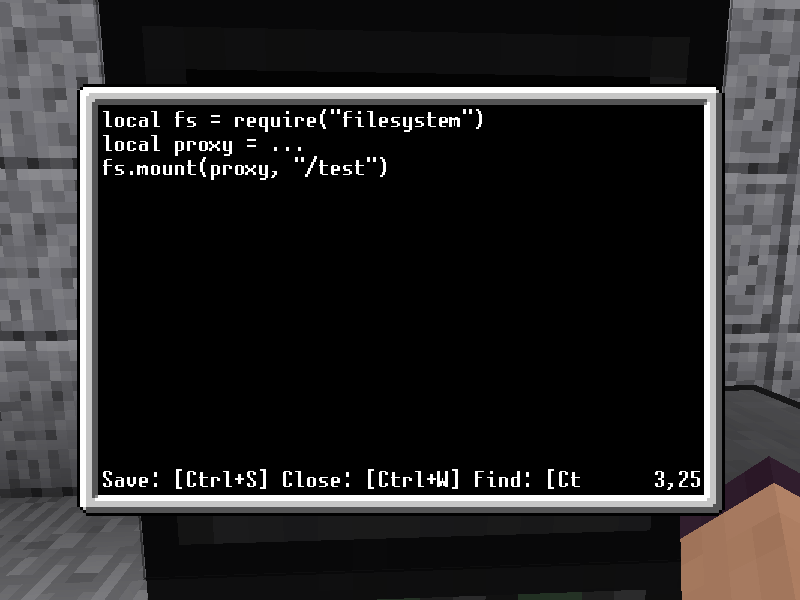
Autorun scripts get the proxy of the storage medium they're on as their first parameter, so we can use Lua's varargs syntax to access it. We'll pass that to the fs.mount() function, which you find documented in the file system API.
Save that file and close it. After removing the hard disk from the computer and inserting it again, run ls and you should see the disk has been automatically mounted again.

Contents
| Tutorials | Mod Specific | Basic Computer - Writing Code - Hard Drives - Autorun and Startup scripts | |
|---|---|---|---|
| Modding | Custom Architectures - IMC Messages - API changes in OC 1.3 - API changes in OC 1.4 - Build and Run master-MC1.7.10 from source | ||
| Programs | OPPM - install | ||
| Others | Custom Operating Systems |